• Skip to primary navigation
  • Skip to main content
  • Skip to primary sidebar

Food Mamma

Food | Travel | Family | Life

  • home
  • about me
  • recipe index
  • eating out
  • events
  • travel

blog

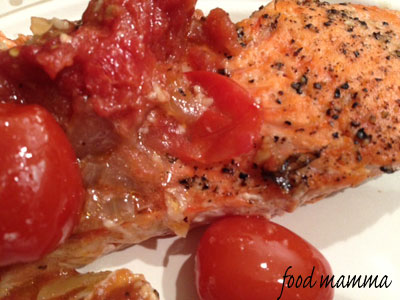
pan rushed salmon with three tomatoes

November 10, 2012 By Fareen 2 Comments

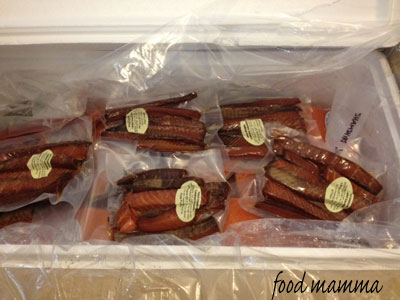
Hubby had an opportunity to go fishing in Northern BC this past July.  He had an awesome time spending three days on the water and catching salmon and halibut.  It was really exciting when the box of fish came and we saw all the little packages of salmon – fresh, smoked and candied, as well as the white fish.

Since then, I’ve been on a mission to find as many tasty fish recipes as I can.  We had the opportunity on Q’s birthday to feed our family with a great big salmon.  We had seen Michael Smith make a pan rushed salmon with three tomatoes on his show and knew we had to try it out.

This was a simple dish that came together very quickly. The final cooking of the fish in the tomatoes resulted in a tasty, juicy fish.  I was able to do the tomato part ahead of time and place it in a roaster so that the final cooking could be done in the oven.  This will be one recipe that we will be going back to again.

Pan Rushed Salmon with Three Tomatoes
Adapted from Chef Michael’s Kitchen

1 large salmon
salt
pepper
2 TB minced garlic
1 onion, diced
1 can, whole tomatoes
2 pints cherry tomatoes
1/2 cup sundried tomatoes

Heat a skillet over medium-high heat and add the oil. Season the
salmon filets with salt and pepper, then sear until lightly browned on
each side, flipping carefully, 3 or 4 minutes per side. Place the seared
salmon on a clean plate and cover lightly with foil.

Add the onion and garlic to the pan and lightly
sauté for 2 to 3 minutes. Add the whole tomatoes, hand crushing as you
go. Add the cherry and dried tomatoes, salt & pepper. Bring
the works to a simmer and cook gently, 2 or 3 minutes.  Place the tomato mixture in a roasting pan and place the fillets on top of the sauce.  Cover tightly and place in a 350 degree oven for 15 minutes.

Filed Under: foodmamma Tagged With: seafood

wordless wednesday: birthday overload

November 7, 2012 By Fareen Leave a Comment

Filed Under: foodmamma Tagged With: wordless wednesday

doodle cupcakes for q’s 4th birthday

November 6, 2012 By Fareen Leave a Comment

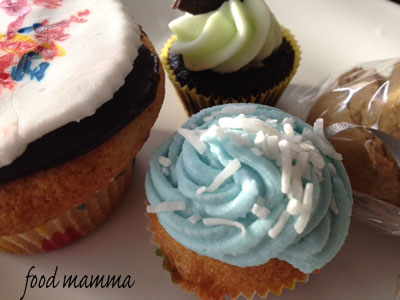
I can’t believe my little man is four today! The time is just flying by, it seems like he was just born. He is the most precious gift and my life would not be the same without him in it.

As with all birthdays in our house, we celebrate all week long and his celebrations started on Friday at preschool. There were cake pops and Spiderman and he came home so happy that he got to celebrate with his school friends.

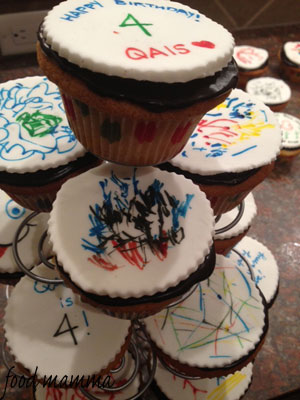
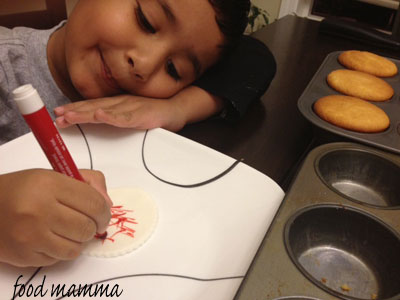
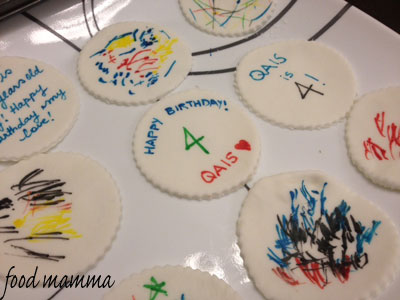
For his actual birthday, I wanted to ensure that it was extra special and the cake always has a part in that. For the cake, I loved the idea that I saw on Sweetapolita with the doodle cake. I knew Q would have a blast decorating his own cake.  I decided to make cupcakes with individual toppers which we all decorated together. It was a lot of fun and it gave us a project to do on Monday evening.

The toppers were made with fondant which I cut into circles with a cookie cutter. I’m not sure why, but fondant really scares me. Well, it did anyways until I found this fabulous recipe via Pinterest.  A fondant made with only marshmallows and icing sugar via Clockwork Lemon. It didn’t take long to come together and, when it did, it was perfectly smooth for some of Q’s (and mamma’s) artwork.

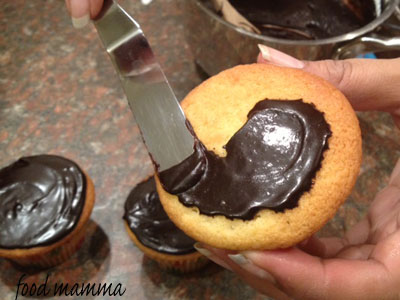
I decided to forego on the icing and instead use a glaze. I’ve been using this recipe for years and it’s so simple to make.

The resulting cupcakes are perfect for celebrating a 4 year old!

Chocolate Glaze

3 TB water
2 TB butter
3 TB cocoa
1 cup icing sugar

Place the water and the butter in a sauce pan and bring it to a boil.  Take it off the heat and immediately mix in the cocoa. Gradually add in the icing sugar and keep mixing until you get the proper consistency.

Marshmallow Fondant
From Sweetapolita

1 cup mini marshmallows
3 TB water
1 to 2 cups icing sugar

Place the marshmallows in a microwave safe bowl and coat them with water.  Warm them up in the microwave in ten second intervals until the marshmallows puff up and can be stirred.  Slowly add icing sugar into the mixture.  When it starts coming together, grease your hands with butter and knead the mixture until it stops being sticky and can be rolled out.

Filed Under: foodmamma Tagged With: cake, celebrations, cupcakes

ice cream cake…and hubby’s birthday!

November 1, 2012 By Fareen 2 Comments

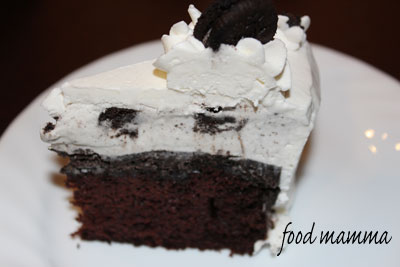
We celebrated hubby’s birthday on Monday.  It wasn’t a big celebration, just a small family dinner with his mom’s cooking and loved ones.  Hubby loves ice cream cake from DQ so this year, I thought I would tackle it myself.  The best part of the store bought cake is the middle layer with the fudge and the chocolate crunchies.  Thanks to Pinterest, I found how to make them with only two ingredients! Although the original cake is all ice cream, I added a layer of chocolate cake, to make it even better.

The verdict?  Hubby loved it!  In fact, he made sure we took the leftovers home, always a good sign.  The crunchy middle tasted just like the DQ version. The chocolate cake with the fudge, the crunchies, ice cream and whipping cream all together made the perfect bite.

Cookies and Cream Ice Cream Cake
(Adapted from Our Best Bites and Brown Eyed Baker)

1 layer chocolate cake (I used this recipe)
3 TB fudge sauce
2 cups Cookies and Cream ice cream, softened


Chocolate crunchies:
2/3 package oreo cookies
3/4 to 1 bottle Magic Shell

Whipping Cream:
1 cup whipping cream
1 TB icing sugar
 
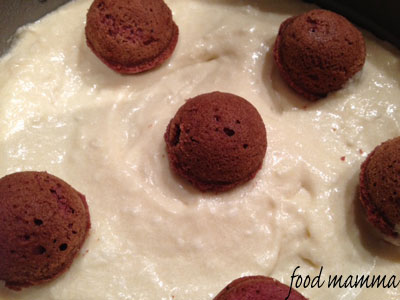
Line a springform pan with saran wrap.  Place a layer of your favourite chocolate cake at the bottom.  Spread a layer of fudge sauce on the cake.

Place the oreo cookies in a food processor and pulse until crushed – small bits not powder. To the crushed cookies, add 3/4 to 1 whole bottle of Magic Shell.  Spread this over the fudge layer of the cake. Place in the freezer for a couple of minutes.  Take the softened ice cream and create a layer on top of the crunchies.  Let freeze overnight.

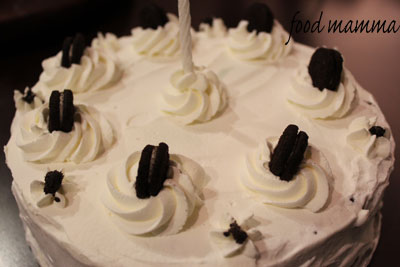
The next day, whip together the cream and the sugar.  Ice the cake with the whipping cream. Top with mini Oreos or shaved chocolate. Place back in the freezer until ready to eat.

Filed Under: foodmamma Tagged With: cake, celebrations

wordless wednesday: happy halloween!

October 31, 2012 By Fareen Leave a Comment

Filed Under: foodmamma Tagged With: wordless wednesday

oliv tasting room…and a giveaway!

October 25, 2012 By Fareen 2 Comments

A couple of weeks ago, we checked out the Rocky Mountain Wine and Food Festival.  Among all the tables sampling various wines and amazing food, there was the Oliv Tasting Room, giving tasters of balsamic vinegar and olive oil. The balsamic vinegar that I tried was thick and syrupy, like it had been reducing on the stove for a while.  It was amazing!

In the few minutes we spent with the owner, Isabeau, we learned all about their lovely oils made in South Africa on their farm and their amazing vinegars sourced directly from Italy.  She also told us about the various ways olive oil is made and how theirs is a true olive oil, not altered with any chemicals. This means a healthier oil.  The balsamic is also of high quality, and it was apparent with every taste.

In their two locations in Saskatchewan and one in Calgary (100-1130 Kensington Road N.W.) the Oliv Tasting Room has samplings, where you can go in and try out the 60+ flavours of oils and vinegars.

Since taking the balsamic vinegar home, we have tried it on everything – from sweet slow roasted tomatoes to crunchy kale chips.  We even tried it on ice cream!

Want to try some for yourself?  Write a comment either here or on Facebook, or send me a tweet.  Contest closes on Monday, October 29th (hubby’s birthday!) at noon.  The winner will have to pick up their prize directly from the store, so Calgary and area only please.  Good luck!

Filed Under: foodmamma Tagged With: events, giveaway

ghost peppers at mucho burrito

October 23, 2012 By Fareen Leave a Comment

Since we first tried mucho burrito, we have loved it. Put anything on nachos and q will just eat it up.

Last night, we decided to go in and try their ghost pepper burritos. Being the wimp that I am when it comes to spice, I probably should have skipped it. It’s a good thing I didn’t see this spice diagram before I ordered!

The ghost pepper burritos could be ordered two different ways – Hotter Than Hell and Wimpy. Wimpy didn’t sound so bad so I decided to give it a try. The red tortilla was smothered in a fig marmalade then topped with rice, veggies, salsa, beans and meat.  The Hotter Than Hell had the addition of a splash of pure ghost pepper sauce.  Yikes!  Both versions came with ghost pepper bacon which we didn’t get added on.

After one bite, my mouth was on fire!   It was so good though that I didn’t want to leave it.  The best part was the fig marmalade, and of course that’s where all the heat was coming from. The marmalade was infused with the ghost peppers. With extra sour cream, I was able to finish most of it. I know a few people who can take the heat, like my mom, would really love this.

Anyone who loves some spice should try it out. There’s one week left to give it a try. Ghost pepper burritos are only here until Halloween.

Disclosure – Mucho Burrito’s PR Company sent me a gift card to try out the ghost pepper burritos. Opinions are my own.

Mucho Burrito on Urbanspoon

Filed Under: foodmamma Tagged With: eating out

chocolate cheesecake

October 22, 2012 By Fareen Leave a Comment

We had a small family get together at my sister-in-law’s new place last weekend.  When we got the invite from her and her hubby, I offered to make dessert, and cheesecake automatically popped into my mind.  It had been a long time since I had eaten cheesecake, let alone made it.  Q decided we should make chocolate and I willingly obliged.

It was a great afternoon with spending time with family and eating good food. Both the kids and the adults kept themselves busy carving pumpkins. The seeds were scooped and roasted making them a perfect snack to go along with all the carving.

I found this recipe on the Hershey’s website.  I didn’t have enough chocolate cookie crumbs so mixed them with graham crumbs and it worked out just fine. The cheesecake was a hit.  This can be made into one big cheesecake or mini ones made in cupcake tins.

Chocolate Cheesecake
Adapted from Hershey’s

1.5 cups chocolate cookie crumbs
6 TB melted butter

1/4 cup butter or margarine
2 packages softened cream cheese
4 eggs
1/2 cup cocoa
1 can condensed milk
1 TB vanilla

Add the melted butter into the crumbs and blend well.  Press mixture into bottom of 9″ springform pan.

Melt the butter and mix with cocoa until smooth. Set aside.

Beat cream cheese.  Add cocoa mixture and mix well.  Gradually beat in condensed milk until smooth.  Add eggs and vanilla and beat well.  Pour batter into pan prepared with the crumb crust.

Bake at 300 degrees for 1 hour and 5 minutes or until set.  Let cool and garnish with whipped cream and chocolate.

Filed Under: foodmamma Tagged With: cake, dessert

wordless wednesday: eating his greens

October 17, 2012 By Fareen Leave a Comment

Filed Under: foodmamma Tagged With: snack, vegetables, vegetarian, wordless wednesday

  • « Go to Previous Page
  • Page 1
  • Interim pages omitted …
  • Page 88
  • Page 89
  • Page 90
  • Page 91
  • Page 92
  • Interim pages omitted …
  • Page 110
  • Go to Next Page »

Primary Sidebar

Let’s Connect!

  • Email
  • Facebook
  • Instagram
  • Pinterest
  • Twitter

Hello!

My name is Fareen and I'm so happy you stopped by! This blog is about my favourite things - family, food and travel. Here you will find adventures with hubby, my two boys and my great big family. There is food (lots of food!), as much travel as we can squeeze in and just life in general.

Sign up for our mailing list!

* indicates required

Featured Post

School Lunch Ideas

Copyright © 2009–2025 · Food Mamma / Fareen Jadavji-Jessa· All Rights Reserved / Privacy Policy