• Skip to primary navigation
  • Skip to main content
  • Skip to primary sidebar

Food Mamma

Food | Travel | Family | Life

  • home
  • about me
  • recipe index
  • eating out
  • events
  • travel

Search Results for: ice cream

key lime pie

January 4, 2014 By Fareen 5 Comments

With all the snow that came down last night, and the nasty roads I kept hearing about, today seemed like a great day to stay in.  We were reminiscing about the cruise we took last month (more to come on that), and recalled the fabulous weather at all the ports. Q wished that he could live in the Bahamas, and on days like today, I wish we did!

Our first port was Key West, Florida, and all the reviews about the quaint little town said that we needed to try the Key Lime Pie. We happily obliged. We had lunch at a restaurant near the water and ended our meal with the much talked about pie. It was delicious, and even hubby, who normally does not have a sweet tooth, enjoyed it.

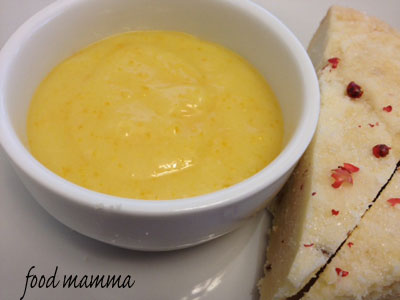
It was a great after lunch project, the smell of the citrus reminding us of summer and hot places. Q did most of the work since it’s super simple to make.  The crust is sweet, the luscious filling is tart and the dollop of whipping cream rounds it all out.

Key Lime Pie
Adapted from Christine Cushing

Crust:
1 cup graham crumbs
1/4 cup melted butter
2 TB sugar

Filling:
1 can condensed milk
3 egg yolks
1/2 cup key lime juice

Topping:
1 cup whipping cream
2 TB icing sugar

Combine the graham cracker crumbs with the melted butter and sugar. Press into a pie dish and bake at 350 degrees for 10 minutes.

Combine the condensed milk, egg yolks and key lime juice and mix until well combined. Pour into the prepared crust and bake at 300 degrees for 25 to 30 minutes. Once cool, refrigerate.

Combine the whipping cream and icing sugar and beat in a mixer until you get peaks. Dollop onto each slice of key lime pie and garnish with a slice of key lime.

Filed Under: foodmamma Tagged With: dessert, pie

food blogger cookie swap: lavender shortbread

December 11, 2013 By Fareen 2 Comments

I had a really fun experience last year when I participate
in the 3rd Annual Food Blogger Cookie Swap. I got to connect with bloggers that I didn’t know and of course, taste some delicious cookies!

This year, with us leaving on holidays, I had to think twice
whether I could make the deadlines. I decided I just couldn’t miss out. For the
swap, we needed to make a new recipe we hadn’t tried before and send it to
three assigned food bloggers.

I knew I wanted to try something with lavender. Most of the
cookies I had found with lavender were of shortbread. Mmmm….shortbread!

I chose this recipe from Dessert First because it was simple
– butter, sugar, flour. My kind of shortbread. You don’t need a lot of
lavender, a little goes a long way.

In the midst of work deadlines, Q’s activities and packing,
I managed to find a chunk of time to bake, wrap and send the cookies. In my
haste though, I completely forgot to include the personalized letters along
with the recipe – sorry folks!

Thanks to the bloggers that sent me cookies. I did receive
one package before I left and they were a nice sweet treat. Looking forward to
devouring more when I get back home!

Thanks to Lindsay and Julie for organizing another
successful cookie swap! Through blogger participation, over $13K was raised for
Cookies for Kids’ Cancer.

Lavender Shortbread
Adapted slightly from Dessert First

1 cup butter, softened
2 cups flour
1/2 cup icing sugar
1 tablespoon dried lavender

Beat the butter and sugar in a mixer until creamy.
Add the flour and beat until combined. Add the lavender and beat just to
distribute through the dough.

Form the dough into a log, wrap in plastic and chill for about an hour.

Preheat the oven to 325 degrees.  Cut the logs into rounds and place on parchment lined baking sheets
and bake until just golden, about 18 minutes.

Filed Under: foodmamma

white chocolate mocha cupcakes

October 29, 2013 By Fareen Leave a Comment

Today is hubby’s birthday! Happy Birthday honey!!

Since our week is usually filled with tons of activities for Q, we celebrated with family over the weekend. We had a tandoor party and made some delicious stuffed naans. I’ll have to fill you in on this soon. As for cake, his request this year was for white chocolate mocha cupcakes.

After a few searches, I settled on a recipe from Ali from Gimme Some Oven. I’ve recently started following her and love all the food that she posts. Since it seemed like I was catching my son’s cold, I needed something quick and simple and this recipe seemed pretty easy.

The whipped frosting was so nice and light, and very reminiscent of a mocha drink. Dusted with cocoa powder and topped with a chocolate covered espresso bean, it was a birthday treat that hubby really enjoyed.

White Chocolate Mocha Cupcakes
From Gimme Some Oven

1 3/4 cups all-purpose flour
2 cups sugar
3/4 cups cocoa powder
2 teaspoons baking soda
1 teaspoon baking powder
1 teaspoon kosher salt
1 cup buttermilk, shaken
1/2 cup vegetable oil
2 eggs, at room temperature
1 tsp pure vanilla extract
1 cup freshly brewed hot coffee
1 1/2 teaspoons instant espresso granules

Frosting:
6 oz. white chocolate, finely chopped
1 1/2 cups cold heavy cream

Preheat the oven to 350 degrees F. Line 24 muffin tins with paper liners or spray with nonstick cooking spray.

In a large bowl, whisk together the flour, sugar, cocoa, baking soda, baking powder, and salt until combined.

In an electric mixer fitted with the paddle attachment, combine the buttermilk, oil, eggs, and vanilla. With the mixer on low speed, slowly add the dry ingredients to the wet until combined. Add the 1 ½ teaspoons of espresso granules to the cup of hot coffee and stir to combine. With mixer still on low, add in the coffee/espresso mixture and stir just to combine, scraping the bottom of the bowl with a rubber spatula. The batter will be really runny, but don’t worry!

Using a large scoop (about 3 tablespoons), distribute the batter into the prepared muffin tins. Bake for 18-22 minutes, or until a toothpick comes out clean. Cool in the pans for 15 minutes, then remove them onto a cooling rack and cool completely. Top with the white chocolate whipped cream frosting, and either serve immediately or refrigerate for up to 48 hours.

To Make The White Chocolate Whipped Cream Frosting:

Place the chopped white chocolate in a heatproof bowl and set the bowl over a pan of simmering water. Melt, stirring occasionally. Meanwhile, bring 1/2 cup of the cream to a boil in a small saucepan. When the chocolate is fully melted, move the bowl to a work surface and pour in the hot cream. Let stand for 1 minute. Stir gently until the cream is incorporated and the mixture is smooth. Let the chocolate/cream mixture stand until it is completely cool. The mixture must be at room temperature before it is added to the whipped cream.

In the bowl of a stand mixer fitted with the whisk attachment, beat the remaining 1 cup of heavy cream only until it holds the softest peaks. With the mixer on high speed, add the white chocolate all at once and continue to beat just until the mixture holds firm peaks. Transfer the cream to a bowl, press a piece of plastic wrap gently against the surface and refrigerate for at least 2 hours. Once cooled, frost cupcakes as desired.

Filed Under: foodmamma Tagged With: celebrations, cupcakes, icing

turkey chili

October 8, 2013 By Fareen 1 Comment

When given a choice, Q would rather have a home cooked meal over eating out. He doesn’t like the usual things you can find on a kids menu. Chicken strips and mac and cheese, forget about it. A bowl full of chili though, and he’s a happy camper.

I tweaked my original chili recipe, omitting chili powder all together and adding more of everything else to ensure a flavourful bowl of goodness. With everything thrown into the slow cooker the night before, we have a hearty lunch ready in the morning with hardly any effort.

You know its a great recipe when my picky little guy asks for seconds. Q likes his topped with cheese, lots of it. It’s also great with some sour cream and green onions or over a baked potato.

Turkey Chili

2 pounds ground turkey, browned and drained
2, 19 oz cans of mixed beans, drained
1, 28oz can crushed tomatoes
2 cloves garlic, minced
3 tsp coriander powder
2 tsp sweet paprika
1 tsp salt
1 tsp pepper
1 TB olive oil
1 large onion, chopped
1/2 cup water

Combine all ingredients in slow cooker and mix thoroughly.
Cook on low for 8 hours. Top with cheese, onions or sour cream.

Combine all ingredients in slow cooker and mix thoroughly.
Cook on low for 8 hours. – See more at: https://foodmamma.com/2010/09/comforting-slow-cooker-chili.html#sthash.Xk50XJIz.dpuf

Combine all ingredients in slow cooker and mix thoroughly.
Cook on low for 8 hours. – See more at: https://foodmamma.com/2010/09/comforting-slow-cooker-chili.html#sthash.Xk50XJIz.dpuf
Combine all ingredients in slow cooker and mix thoroughly.
Cook on low for 8 hours. – See more at: https://foodmamma.com/2010/09/comforting-slow-cooker-chili.html#sthash.Xk50XJIz.dpuf
Combine all ingredients in slow cooker and mix thoroughly.
Cook on low for 8 hours. – See more at: https://foodmamma.com/2010/09/comforting-slow-cooker-chili.html#sthash.Xk50XJIz.dpuf
Combine all ingredients in slow cooker and mix thoroughly.
Cook on low for 8 hours. – See more at: https://foodmamma.com/2010/09/comforting-slow-cooker-chili.html#sthash.Xk50XJIz.dpuf
Combine all ingredients in slow cooker and mix thoroughly.
Cook on low for 8 hours. – See more at: https://foodmamma.com/2010/09/comforting-slow-cooker-chili.html#sthash.Xk50XJIz.dpuf

Filed Under: foodmamma Tagged With: comfort, slow cooker

mentions

Reviews on Urban Spoon
Calgary Herald Top Blogs
Foodista Blog of the Day (May 12, 2013)
Pop Sugar – Kid-Friendly Recipes for Cinco de Mayo (April 2013)
Club Life Magazine – Red Lentil Curry (April 2013) 
Anyday Magic, Caramel Challenge – Caramel Creme Brulee (April 2013)
Ismaili Mail (February 2013) 
Energy for the Good Life – Peanuts, a favorite of the South (January 2013)
Parents Canada – 30 minute chicken and spinach curry (November 2012)
Recipe Makeover, Anyday Magic – Indian Rice Pudding (August 2012) 
Featured on Yummy Mummy Club, Foodie of the Week (August 2012)
Winner of Family Kitchen’s Best Homemade Chocolate Recipe (February 2012)
Mentioned on BC Tree Fruits (February 2012)
Featured on Anyday Magic – Red Velvet Crepes (December 2011)
Recipe in Club Club Community Cookbook (2011) 
Mentioned on Ceci n’est pas un food blog: A Brunch Potluck (October 10, 2011)
Mentioned on Christie’s Corner:  Brunch (September 30, 2011)
Mentioned on Dinner with Julie: A Potluck! (May 29, 2011)
Mentioned on Circle of Moms – Top 25 Foodie Moms (March 2011)
Featured in The Calgary Herald – Food Porn Friday: Pain au Chocolat aux Amandes (February 25, 2011)

meyer lemon curd

April 22, 2013 By Fareen Leave a Comment

Every time I bring home some meyer lemons, I always think I’m going to make some curd and then never get around to it. This time, I was determined to make it happen and I’m so glad I did!

Lemon curd is made by combining lemon juice with butter, eggs and sugar and cooking it into a custard. This tangy and sweet curd is bright, both in taste and colour, I used a recipe by Ina Garten and it was super easy to make. The result was a curd that was luscious and creamy.


Light and refreshing, the curd is perfect with fruit, spread on toast or even served with a slice of some peppercorn shortbread.

Meyer Lemon Curd
From Ina Garten, Barefoot Contessa

3 lemons
1 1/2 cups sugar
1/4 pound unsalted butter, room temperature
4 extra-large eggs
1/2 cup lemon juice (3 to 4 lemons)
1/8 teaspoon kosher salt

Using a carrot peeler, remove the zest of 3 lemons, being careful to avoid the white pith. Put the zest in a food processor fitted with the steel blade. Add the sugar and pulse until the zest is very finely minced into the sugar.

Cream the butter and beat in the sugar and lemon mixture. Add the eggs, 1 at a time, and then add the lemon juice and salt. Mix until combined.

Pour the mixture into a 2 quart saucepan and cook over low heat until thickened (about 10 minutes), stirring constantly. The lemon curd will thicken at about 170 degrees F, or just below simmer. Remove from the heat and cool or refrigerate.

Filed Under: foodmamma Tagged With: breakfast, dessert, fruit

lobster and prawn cannelloni

April 19, 2013 By Fareen 1 Comment

Hubby and I celebrated our seven year anniversary on Monday! I feel like I was just reminiscing the other day about our honeymoon and that flashback has already been a year! Time really does fly.

Although we went for sushi with our little guy on the weekend, I wanted to make hubby something special.  My cousin had been talking about lobster mac and cheese a few weeks ago and I had been thinking about it ever since. Lobster definitely had to be in the picture, I just changed the cheese and pasta – cannelloni!

I filled the tubes with a flavourful mixture of ricotta cheese, sweet lobster and meaty prawns. Instead of using a bechamel, I opted for an alfredo sauce which covered the filled pasta shells and baked them in some bubbly cheesy goodness.

The richness was cut by the addition of some fresh tomatoes. The perfect indulgent meal to celebrate!

Lobster and Prawn Cannelloni

10 cannelloni shells, cooked as per package

2 lobster tails, cooked and cut into chunks
10 large prawns, cooked and cut into pieces
1 onion, diced
2 cloves garlic, minced
3/4 cup ricotta cheese
1/2 parmesan cheese
bunch of basil, chopped
salt
pepper

1/4 cup butter
2 cloves garlic, minced
1 cup whipping cream
1 cup parmesan cheese
pinch nutmeg

Cook the onion and garlic in a bit of oil until softened.  Combine with the cheese, seafood and basil. Stuff this mixture into the cannelloni and place in an oven safe dish.

For the sauce, melt the butter in a saucepan.  Add cream and garlic and let simmer for a few minutes.  Add the cheese and a pinch of nutmeg and stir until the cheese has melted.

Pour the alfredo sauce over the filled cannelloni and bake in a 350 degree oven for 25 to 30 minutes until golden and bubbly.

Filed Under: foodmamma Tagged With: celebrations, cheese, pasta, seafood, shrimp

chocolate mousse cake

March 26, 2013 By Fareen Leave a Comment

It’s been a lovely month of birthdays and we’ve had a great time celebrating with family, and lots of cake! This past Friday was my dad’s birthday and I wanted to make something awesome for this special man. Chocolate and mousse came to mind.

I made a chocolate cake but baked it in a sheet pan to make a thin layer. I cut this one layer into three to make a nice tall cake, kind of like the tuxedo cake at Costco.  I made a simple mousse by combining melted chocolate and whipping cream and spread it between the chocolatey layers.  It was also the crown of the cake topped with shaved chocolate.  It was kind of a mess of a cake but everyone loved it.

Chocolate Mousse Cake

Your favourite chocolate cake recipe, like this one
1 cup chocolate chips, melted
1 1/2 cups whipping cream

Beat the whipping cream until peaks are formed.  Fold slowly into the melted chocolate until both are incorporated. Let chill for half an hour.  Cut the cake into layers and spread the mousse between the layers.

Filed Under: foodmamma Tagged With: baked goods, celebrations

salmon burgers

January 29, 2013 By Fareen Leave a Comment

Hubby had a great time in Fernie over the weekend, snowboarding and hanging out with the boys. This has been an annual trip of theirs, which usually involves a lot of red meat (i.e. ribs, ribs and more ribs!).  Needless to say, this week needs to be filled with lots of fish and veggies.

I had wanted to make salmon burgers for a while and this was the perfect opportunity.  I didn’t really measure, just threw in some flavours that I thought would work well.  I took one pound of salmon which I cut into chunks and then pulsed it in the food processor.  I added some chopped onion, an egg, some soya sauce, sesame oil, ginger, salt, pepper and then binded it all together with some bread crumbs.  When I play with flavours like this, I always like to cook off a little bit and make sure that it tastes good before making patties and cooking off the rest.

I let the formed burgers rest in the fridge for a bit and then pan fried them with just a touch of olive oil.  Served on a toasted whole wheat bun with some mayo and topped with slices of creamy avocado, it was full of flavour and totally hit the spot.

Filed Under: foodmamma Tagged With: seafood

serendipity 3 (las vegas)

December 28, 2012 By Fareen Leave a Comment

After Q and I spent a week in Texas, we met hubby in Vegas for a few days.  It was fun for Q to see the lights and he was pretty great when it came time to outlet shopping.  When driving the Strip, I noticed Serendipity 3 outside the Caesar’s Hotel.  I had always wanted to go to the original in NYC, but knowing I wasn’t going there anytime soon, I had to go while in Vegas.

Made famous in the movie Serendipity, and then even more so by Oprah, I knew I had to try the Frrrozen Hot Chocolate. The place was packed and we had a bit of a wait but it was worth it.

We ordered the drink for two and it was huge!  The three of us shared but we could have easily shared with three more.  It was a chocolatey blend of icy goodness topped with whipping cream.   So good!  As we sipped the yummy concoction, we got chunks of chocolate shavings while we sipped.

Would I go back for more? Most definitely!

Serendipity 3 on Urbanspoon

Filed Under: foodmamma Tagged With: eating out, vacations

  • « Go to Previous Page
  • Page 1
  • Interim pages omitted …
  • Page 15
  • Page 16
  • Page 17
  • Page 18
  • Page 19
  • Page 20
  • Go to Next Page »

Primary Sidebar

Let’s Connect!

  • Email
  • Facebook
  • Instagram
  • Pinterest
  • Twitter

Hello!

My name is Fareen and I'm so happy you stopped by! This blog is about my favourite things - family, food and travel. Here you will find adventures with hubby, my two boys and my great big family. There is food (lots of food!), as much travel as we can squeeze in and just life in general.

Sign up for our mailing list!

* indicates required

Featured Post

School Lunch Ideas

Copyright © 2009–2025 · Food Mamma / Fareen Jadavji-Jessa· All Rights Reserved / Privacy Policy