• Skip to primary navigation
  • Skip to main content
  • Skip to primary sidebar

Food Mamma

Food | Travel | Family | Life

  • home
  • about me
  • recipe index
  • eating out
  • events
  • travel

fruit

homemade fruit roll-ups

September 10, 2015 By Fareen 6 Comments

School is in full swing and so is trying to figure out what to send for lunches and snacks. Things Q likes one week may not be a fave the next. Making sure I send things that he will actually eat and not stay hungry can be a struggle.

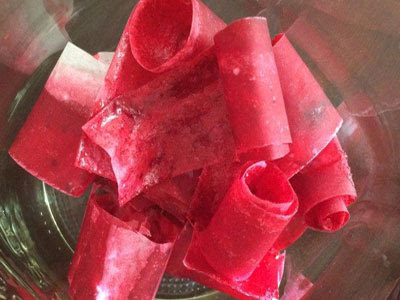
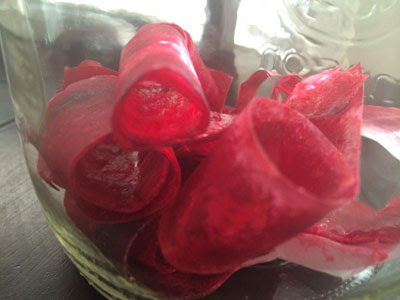
I was so happy I found this recipe for homemade fruit roll-ups. You can use whatever fruit is seasonal or the favourite that week and unlike the store variety, you know exactly what is going in them. These are super easy to make and always a hit!

Homemade Fruit Roll-ups
From Kitchen Daily 

4 cups berries
1/2 cup sugar
1 TB lemon juice

In a food processor or blender, puree your fruit, sugar and lemon juice.

Cook in a saucepan over medium heat until thick, 20-30 minutes. Strain through a fine sieve onto a baking sheet lined with parchment or Silpat. Shake the pan to level.

Bake at 170 degrees until dehydrated, about 3 hours (puree should be just slightly sticky but not dry). Let cool for 10 minutes.

If you lined your baking sheet with parchment you can cut the dried fruit into desired shapes. If you used a Silpat, place a sheet of parchment (cut to the size of your baking sheet) on your work surface. Carefully invert the fruit and Silpat onto the parchment and peel the Silpat away.

Cut into eight rectangles, or about 13 crosswise “strips”. Roll up with the parchment and tie with twine or baker’s string. Store at room temperature for up to 1 month.
Filed Under: foodmamma Tagged With: back to school, fruit, school, snack

banana cake

July 14, 2015 By Fareen Leave a Comment

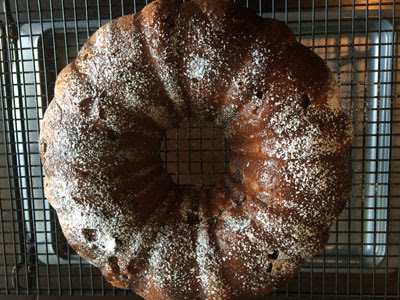
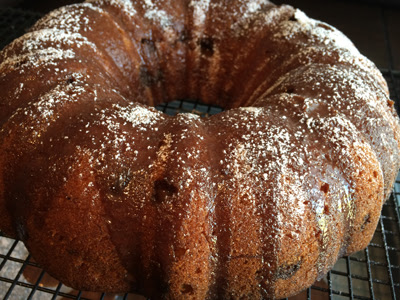
There’s something about a bundt cake. It looks great, provides comfort and always seems to impress.

My mom makes really amazing banana cupcakes.They are moist and flavourful and perfect for on the go. I decided to use her recipe but made a bundt to serve for dessert. The ripe bananas made the cake sweet and the chocolate paired so well with the fruit.

The cake itself was fine on its own but I thought I’d make it even better – I added chocolate on top! I made a quick ganache and once it was a little cool, I poured it on top of the cake. It took it to another level. Chocolate always seems to have that effect.

Banana Cake

1 cup butter
1 cup sugar
2 eggs
2 ripe bananas
2 1/4 cup flour
1/2 tsp baking soda
1 tsp baking powder
1 cup yogurt
1/2 cup chocolate chips

1 cup chocolate chips
1 cup whipping cream

icing sugar

Cream together the butter and sugar. Add eggs, one at a time, until incorporated. Mash the bananas and add to the mixture.

Add the flour, baking soda and baking powder. Add in the yogurt and the chocolate chips.

Pour the batter into a greased bundt pan or muffin pan. Bake at 350 degrees for 45 minutes.

For the topping, heat the whipping cream until it starts boiling. Pour over the chocolate chips. Let cool a bit and then pour on top of the cooled cake. It’s best to place the cake on top of a rack placed on top of a tray. Dust with icing sugar.

Filed Under: foodmamma Tagged With: baked goods, chocolate, dessert, fruit

strawberry kulfi

June 19, 2015 By Fareen 1 Comment

One of the best things about summer is all the great fruit. From cherries and lychees to watermelon and strawberries, there is something for everyone.

The other best thing – ice cream! You don’t really need much of an excuse in the summer, right?

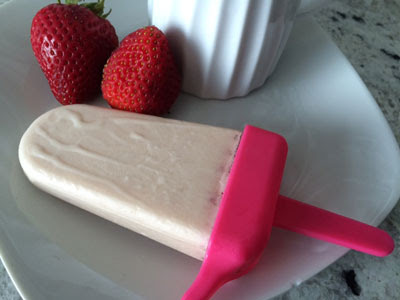
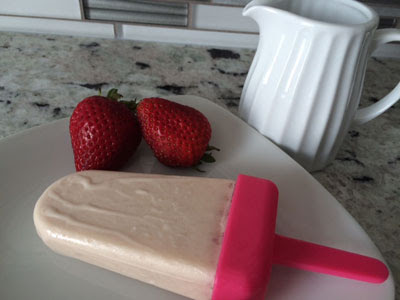
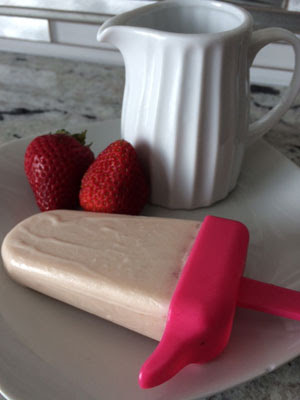
I decided to add some strawberries to one of our favourite ice creams, kulfi. The marriage of the berries with the kulfi mixture was a delicious one.

Kulfi is one of the easiest things to make. You don’t even need an ice cream machine. Just mix everything together and pour into the molds. Easy peasy!

Strawberry Kulfi

1 cup whipping cream
1 can evaporated milk
1 can condensed milk

1/3 cup strawberries, pureed
3 splashes of kewra
essence

Mix everything together and pour into popsicle molds. Once frozen, enjoy!

** Kewra is an Indian essence used in desserts. It can be found in most East Indian grocery stores.

Kulfi

1 cup whipping cream
1 can evaporated milk
1 can condensed milk
3 splashes of kewra essence
roasted almonds

Mix the milks and essence together and pour into a shallow dish and top
with almonds.  The mixture can alternately be put into popsicle molds. 
If using an ice cream machine, add the almonds in the last five minutes.
– See more at:
http://www.foodmamma.com/2011/07/kulfi-two-ways.html#sthash.ujjuXylV.dpuf

Filed Under: foodmamma Tagged With: fruit, ice cream

my favourite way to cut watermelon

June 4, 2015 By Fareen 2 Comments

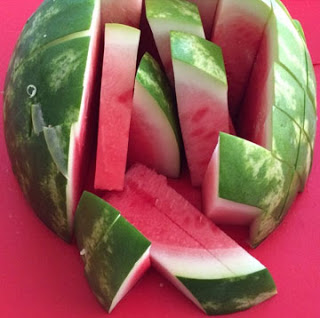
It’s the season for watermelon! Ever since Julie posted this last year, it has become my favourite
way to cut and eat watermelon. These spears definitely make sense, especially for
the little ones. Check it out here.

Filed Under: foodmamma Tagged With: fruit

the weetabix #mybixmix challenge

May 19, 2015 By Fareen Leave a Comment

A month ago, I was challenged to change up my morning routine with the addition of Weetabix.  Weetabix is made with four ingredients. Each two biscuit serving contains just 2g of sugar and is packed with whole grains. Low in fat, high in fibre, it just made sense to serve this to my family. With simple ingredients, it gives you a chance to personalize it the way you like, without any guilt – #mybixmix!

For a week, we started our day with a bowl of Weetabix, changing it up everyday with toppings like fruits and nuts. Here are some of the ways we enjoyed our bix!

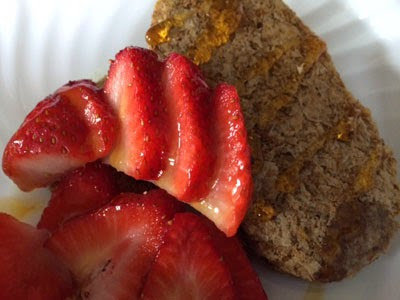
With strawberries and agave syrup:

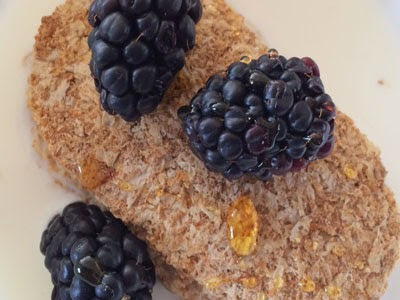
With blackberries and honey:

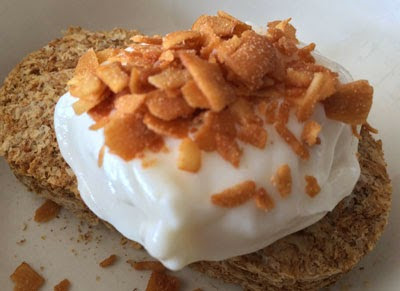
Topped with yogurt and coconut chips:

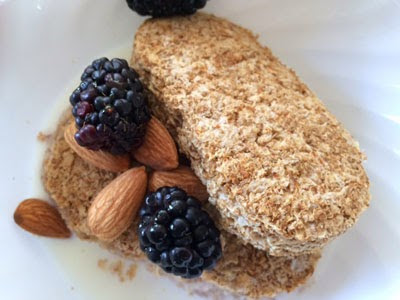
With blackberries and almonds:

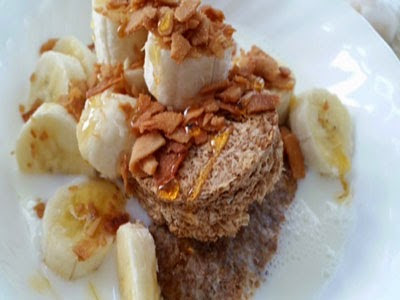
With a tropical twist – bananas and coconut chips:

The cereal was a hit with both the six year old and the one year old – always a bonus. It kept us full and the various toppings made it seem like a different breakfast every day.

How will you mix your bix?

Disclaimer – I was sent product to help with the challenge as well as compensation. All opinions are my own.

Disclaimer
– GLAD sent me products to help with the challenge as well as
compensation. All opinions are my own. – See more at:
http://www.foodmamma.com/2014/10/glad-fresh-food-challenge.html#sthash.esVVsVan.dpuf
Disclaimer
– GLAD sent me products to help with the challenge as well as
compensation. All opinions are my own. – See more at:
http://www.foodmamma.com/2014/10/glad-fresh-food-challenge.html#sthash.esVVsVan.dpuf
Disclaimer
– GLAD sent me products to help with the challenge as well as
compensation. All opinions are my own. – See more at:
http://www.foodmamma.com/2014/10/glad-fresh-food-challenge.html#sthash.esVVsVan.dpuf

Filed Under: foodmamma Tagged With: breakfast, fruit, sponsored

avocado, banana and raspberry smoothie for williams-sonoma smoothie week

December 30, 2014 By Fareen 5 Comments

After days of turkey leftovers, stuffing and potatoes, Williams-Sonoma’s Smoothie Week comes at the perfect time. We are all out of sorts when school is out and it’s easy to fall out of routine. Smoothies are a great way to ensure that all of us are still getting in our fruits and vegetables.

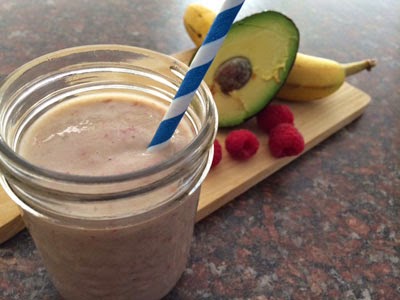
This smoothie is a new favourite of ours. I love the creaminess that avocados bring to smoothies, not to mention all the fiber and the good fats that it adds. As much as Q likes avocados, he’s always skeptical to have them in his drink.  The taste of the avocado is subtle though and when paired with bananas and raspberries, he had no clue.

Avocado, Banana and Raspberry Smoothie 

1/2 ripe avocado
1 banana
1/2 cup raspberries
milk 

Throw everything into a blender and enjoy!

Filed Under: foodmamma Tagged With: drinks, fruit, milk, smoothie

sour cream cake with cherries

July 15, 2014 By Fareen 1 Comment

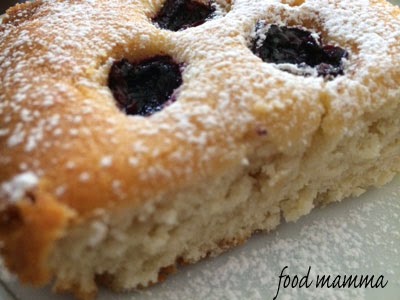
One of my favourite parts of summer are the delicious cherries that we get to enjoy. I could eat bowls of them, just by myself. Not only delicious fresh from the market, they are even great when used for baking. Cherry pie, yum!

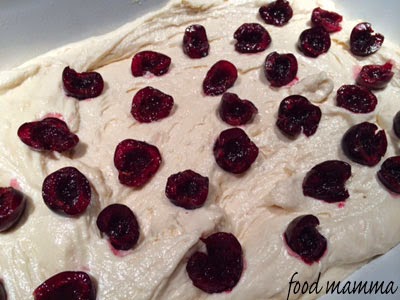
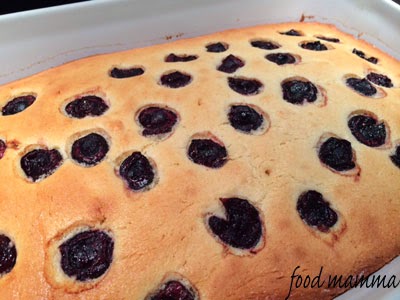
I had been thinking about this for a while and I finally had a chance over the weekend to try it out.  One of my go-to cake recipes studded with cherries. The cake came out of the oven with the cherries blackened and the flavour intensified from the roasting.

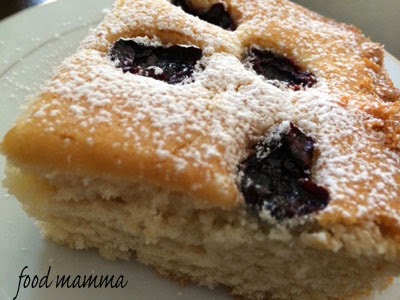
It was a really great combination, served with a sprinkle of icing sugar right on top.

Sour Cream Cake with Cherries

1 cup butter
1 1/4 cup sugar
1 tsp vanilla
2 eggs
1 cup sour cream
2 cups flour
1/2 tsp baking soda
1 tsp salt
1 1/2 tsp baking powder
1 cup cherries, pitted and halved

Combine the butter and sugar and beat for a couple of minutes. Add the vanilla and eggs until incorporated.  Add the sour cream.

In a separate bowl, combine the dry ingredients and add to the butter and egg mixture.  Put batter in a greased 9″ x 12″ baking pan and top with the halved cherries. Bake at 350 degrees for 1 hour.  Once cooled, cut into squares and sprinkle with icing sugar.

1 cup butter
1 1/4 cup sugar
1 tsp vanilla
2 eggs
1 cup sour cream
2 cups flour
1/2 tsp baking soda
1 tsp salt
1 1/2 tsp baking powder

Combine the butter and sugar and beat for a couple of minutes. Add the vanilla and eggs until incorporated.  Add the sour cream.

In a separate bowl, combine the dry ingredients and add to the butter
and margarine mixture.  Put batter in a greased pan and bake at 350
degrees for 1 hour. – See more at: http://www.foodmamma.com/2013/03/sour-cream-cake.html#sthash.cuDnwAay.dpuf

Filed Under: foodmamma Tagged With: cake, fruit

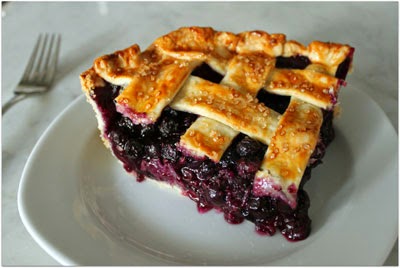
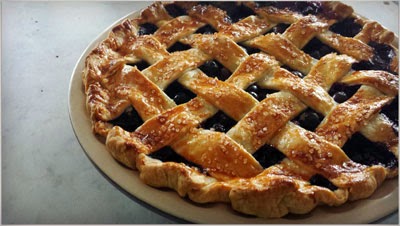
guest blogger: bernice’s blueberry lattice pie with lemon zest and spruce buds

June 17, 2014 By Fareen 1 Comment

Life has been busy and my blog has been a little neglected lately. I’m so happy to have Bernice from Dish ‘N’ The Kitchen guest blog today. Her blueberry pie sounds scrumptious! Thanks Bernice!

~ 

Sometimes life has a way of grabbing on and taking time away from blogging. Sometimes it’s difficult to keep up with blog post when situations arise…but not all these life situations are bad! My friend and fellow blogger, Fareen at Food Mamma has just become a new mother and she may be just a bit distracted over the coming months. She needs a bit of extra time to settle in with her new family dynamic and to get to know her new little one. I’m excited and honoured to be a guest post on her blog…my first guest post!  Fareen and fellow readers; grab a cuppa and please enjoy this pie post from my kitchen to yours.

Blueberry Pie. Mmmmm. I just couldn’t get it out of my head following Monday’s Masterchef US episode.  Monday’s blueberry pie episode was inspirational; so many lovely pie variations and so many different methods of making pastry as well.  I’ve actually been making a lot more pies than I used to…using different methods and ingredients so that I can find ‘the pastry recipe’ that works for me. I’ve had great success using my KitchenAid mixer but now that I have a food processor it’s almost scary how fast I can whip up a batch of pastry. Sometimes it’s just too convenient!

The pastry method I used for this pie was described by Inspired Taste. Essentially you just add a portion of the flour, salt, and sugar then add all the butter one bit at a time pulsing in between. then you add the remainder of the butter. The butter ends up coating the flour and protecting it from the cold water you add later. In the end less gluten is formed, making the pie crust tender and flaky. I also usually have such a difficult time rolling out pastry dough…but not with this recipe! I was pretty impressed with this pastry method and so was the family. I think it may be a ‘keeper’.

Phew! Now that I have that evil pie essential that is pastry out of the way we can talk filling. Obviously blueberry. What I saw on the show was a plethora of mixes but I wanted to do something completely different. I wanted my filling to be unique and I was inspired by my childhood and a friendly reminder of it during a dessert I had at Q Haute. It was called Blueberry & Pine. These two flavours really work together though really that is no surprise considering how close they are in nature. As a kid I spent many days picking wild blueberries with my grandma in remote bush areas. She would get word on where the picking was good and off we would go, ice cream pails attached to our belts. We wouldn’t go home until they were full. As we picked we breathed in the scent of pine while we stole the odd mouthful of berries. I wanted my pie to contain that memory.


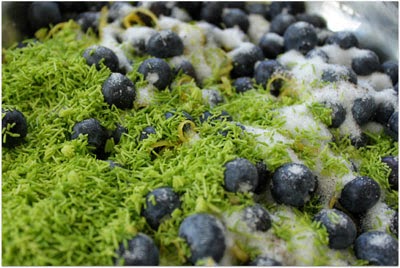
I’ve been waiting patiently for the spruce tree in my front yard to bud. I think it happened a bit later this year but last week I was able to pick a container full of the buds. I had enough to pickle a couple of jars for later use with a just enough left over to add to the pie filling. I also added some lemon zest because I think it is an essential ingredient in blueberry pie. Other than that, a large pinch of freshly ground allspice, some sugar, cornstarch, and salt. Pretty simple.

Pie Pastry (from Inspired Taste)

2 1/2 cups (360 grams) all-purpose flour
1 teaspoon kosher salt
1 tablespoon sugar, optional
1 cup (227 grams) very cold unsalted butter, cut into 1/2-inch cubes (2 sticks)
6 to 8 tablespoons ice water

Add 1 1/2 cups flour, salt and sugar to a food processor. Pulse 2 to 3 times until combined.
Scatter butter cubes over flour and process until a dough or paste begins to form, about 15 seconds. It will look nice and ‘sandy’.
Scrape bowl, redistribute the flour-butter mixture then add remaining 1 cup of flour. Pulse 4 to 5 times until flour is evenly distributed. (Dough should look broken up and a little crumbly).
Transfer to a medium bowl then sprinkle 6 tablespoons of ice water over mixture. Using a rubber spatula, press the dough into itself. The crumbs should begin to form larger clusters. If you pinch some of the dough and it holds together, it’s ready. If the dough falls apart, add 1 to 2 tablespoons of extra water and continue to press until dough comes together.
Remove dough from bowl and place in a mound on a clean surface. Work the dough just enough to form a ball (do not overwork). Cut ball in half then form each half into discs. Wrap each disc with plastic wrap and refrigerate at least 1 hour, and up to 2 days. You can also freeze it for up to 3 months (just thaw it overnight in the fridge before using).
Before rolling, take pastry out and let sit for five minutes. Flour your work surface and roll one disk of dough out to 1/8 inch thickness using your pie plate as a size guide.
Fill pie shell with blueberry filling.

Blueberry Filling

3/4 cup sugar
1/4 cup cornstarch
good pinch freshly ground allspice
1 tbsp lemon zest
pinch salt
1/2 cup finely cut fresh spruce buds
1 tbsp cold butter cut in tiny cubes
1 egg yolk
1 tsp cream
coarse sugar

Mix all together in a bowl. Place in pie crust.
Pre heat oven to 400 F.
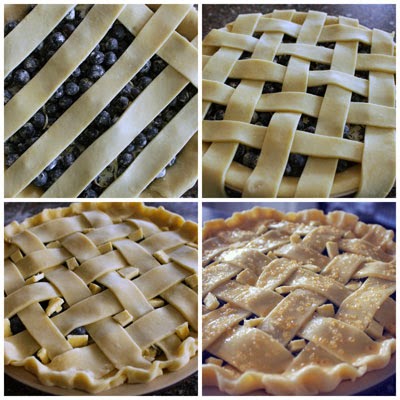
Take the second disk of pastry, roll it out and cut into strips as wide as you like. I ended up with five strips covering the diameter of the pie, then another five in the other direction.
Weave the strips over the filling as you place them and make sure the ends over hang the edges of the bottom pastry.
Tuck the ends under and pinch the crust edge all the way around the pie.
Dot exposed filling in between strips with tiny cubes of butter. Refrigerate pie for another 30 minutes.
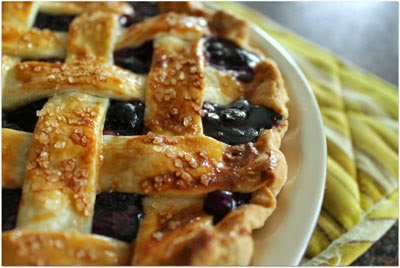
Mix egg yolk and cream in a bowl and brush pastry before baking. Sprinkle pastry with coarse sugar.

Place pie on a cookie sheet in bottom 1/3 of oven and bake for 20 minutes. Reduce temperature to 350 F and bake for another 35-45 minutes. The crust should be nice and golden and the filling will be bubbly.

WARNING! this is the hard part….let cool for 3 hours so that the filling sets.

Filed Under: foodmamma Tagged With: baked goods, fruit, guest blogger, pie

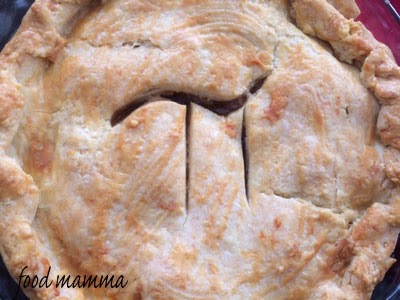
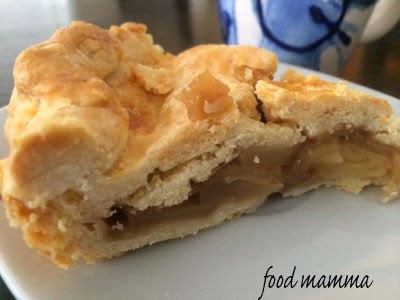
apple pie with a cheddar crust…for pi day!

March 14, 2014 By Fareen 1 Comment

It’s Pi Day – giving me a great excuse to make a pie. I’ve had this on my list of things to make and what better day to make it.

Sugar and cinnamon tossed apples are baked within a cheesy, buttery crust. The sweet and savoury combo is definitely a win!

Apple Pie with a Cheddar Crust

Cheddar Crust
From Martha Stewart

2 1/2 cups flour
1 tsp salt
2 sticks cold butter, cut into small pieces
1/4 to 1/2 cup ice water
1 cup shredded cheddar cheese

Pulse flour and salt in a food processor until combined. Add butter, and pulse until mixture resembles coarse meal, about 10 seconds.  Drizzle 1.4 cup water evenly over mixture. Pulse until mixture just begins to hold together (dough should not be wet or sticky). If dough is too dry, add more water, 1 TB at a time, and pulse. Add cheese; pulse until combined.

Shaped into 2 disks, and wrap each in plastic wrap. Refrigerate until chilled, about 30 minutes or up to overnight.

Filling:

5 Granny Smith Apples, peeled and sliced
2 TB lemon juice
1/2 brown sugar
1/4 cup flour
1 tsp salt
1 tsp cinnamon

Finish:

1 egg
2 TB water

Combine the apples with the lemon juice, sugar, flour and spices.

On a floured board, roll out pastry, using your pie plate as a guide.
Place the first circle in the pie plate and fill with filling. Top with
the second crust. Fold bottom pastry over the top and crimp the edges.
Using a pastry brush, brush the crust with the egg and water mixture and add some vents.

Bake at 375 F for about an hour, until the crust is nice and golden.

Filed Under: foodmamma Tagged With: cheese, fruit, pie

banana nutella spring rolls

March 13, 2014 By Fareen Leave a Comment

While we were in Houston in December, we stopped to have dinner at one of my favourite restaurants, P. F. Changs. We may have gone there a couple times, but more on that later.

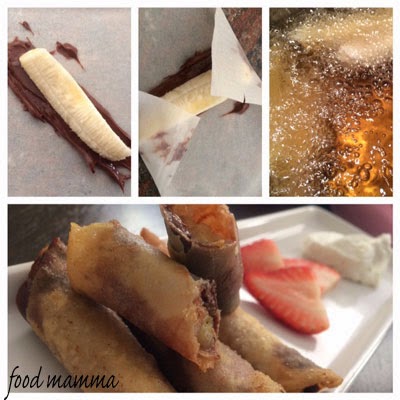
We had ordered the banana spring rolls for the three of us to share.  Hubby and I were lucky to get a bite before Q inhaled the dessert. He loved it! How could you not? Bananas enveloped in the crisp spring roll wrapper and topped with ice cream and caramel. Yum!

This was a super easy dessert to make at home. In fact, it was made even better with Nutella!  A spread of chocolate down the middle of a spring roll wrapper, a spear of banana, rolled and fried to perfection. It’s fruit so it’s not bad for you, right?

Filed Under: foodmamma Tagged With: dessert, fruit

  • « Go to Previous Page
  • Page 1
  • Page 2
  • Page 3
  • Page 4
  • Go to Next Page »

Primary Sidebar

Let’s Connect!

  • Email
  • Facebook
  • Instagram
  • Pinterest
  • Twitter

Hello!

My name is Fareen and I'm so happy you stopped by! This blog is about my favourite things - family, food and travel. Here you will find adventures with hubby, my two boys and my great big family. There is food (lots of food!), as much travel as we can squeeze in and just life in general.

Sign up for our mailing list!

* indicates required

Featured Post

Poke Rice Waffle

Poke Rice Waffle

Copyright © 2009–2020 · Food Mamma / Fareen Jadavji-Jessa· All Rights Reserved / Privacy Policy